Lilygo T-Deck Plus Meshtastic Review
The Meshtastic project aims at offering text communication and low-bandwidth data across long distances without relying on any centralized third parties or corporate infrastructure, but most devices require a cell phone or laptop to actually interact with that network. The Lilygo T-Deck resolves this by offering an all-in-one product with a LoRa radio, GPS, and most importantly a full color touch screen and full QWERTY keyboard.
Folks whose phone's have only had touch screens may not realize, but mobile devices used to have physical keypads with physical buttons. For those of us who do remember, this Blackberry-esque device is a nice bit of nostalgia for up-and-coming hobbyist tech.

Specs
| Spec | Value |
|---|---|
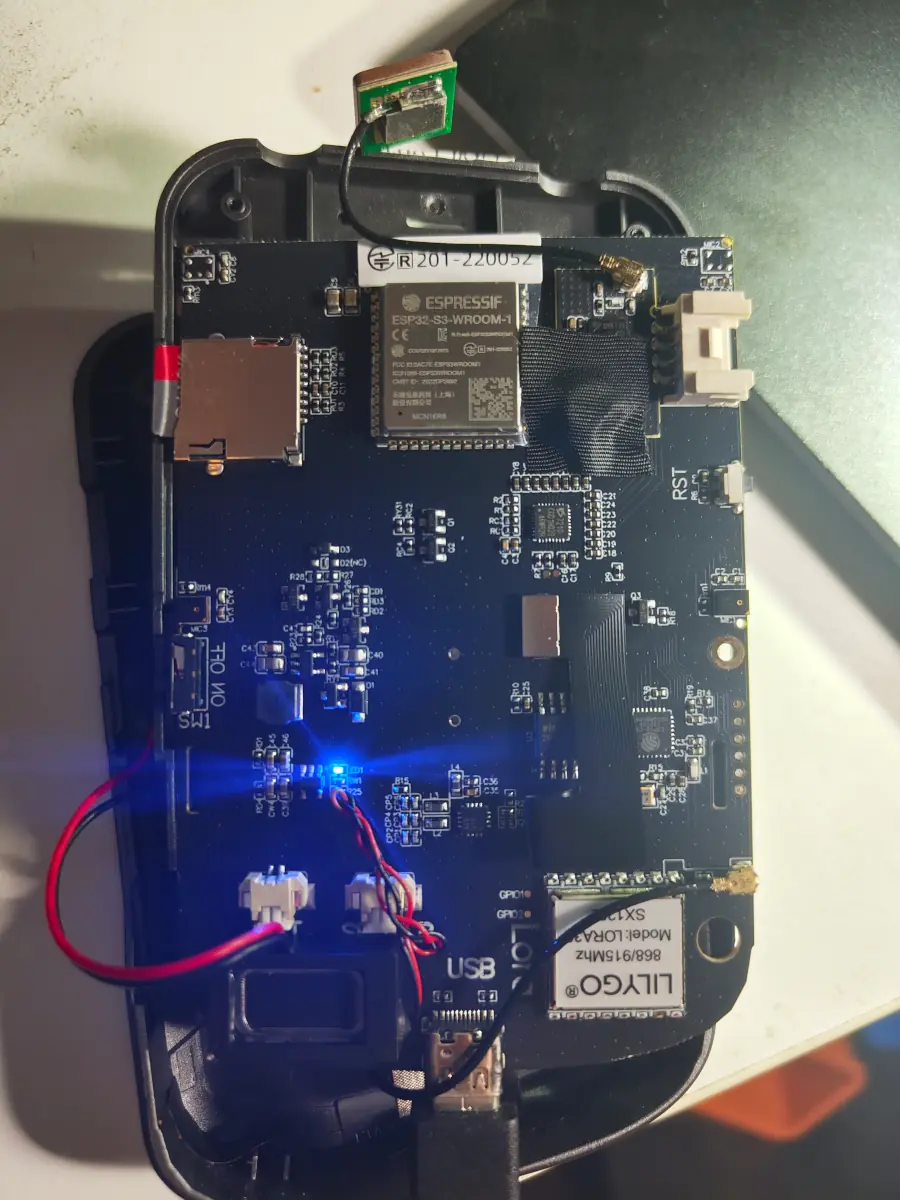
| Processor | ESP32-S3FN16R8 Dual-core LX7 |
| Wireless | 2.4 GHz Wi-Fi & Bluetooth 5 (LE) |
| Flash | 16MB |
| PSRAM | 8MB |
| GPS | MIA-M10Q GNSS |
| Screen | 2.8-inch ST7789 320 x 240 LCD |
| Battery | 2000mAh |
| Storage | TF / μSD Slot |
| Microphone | MSM381A3729H9CP |
| Audio | ES7210 |
| Interface | USB-C |
| LoRa Radio | SX1262 LoRa |
| Transmit | +22dBm |
Features
The Lilygo T-Deck Pro is a slick little device with a color display and touch screen for controlling the UI. The Meshtastic available on the T-Deck offers:
- Overview page that lists number of nodes available, time, and other general information
- Detailed node list that displays telemetry data for visible nodes
- Channel list and configuration
- Current group chats and direct messages
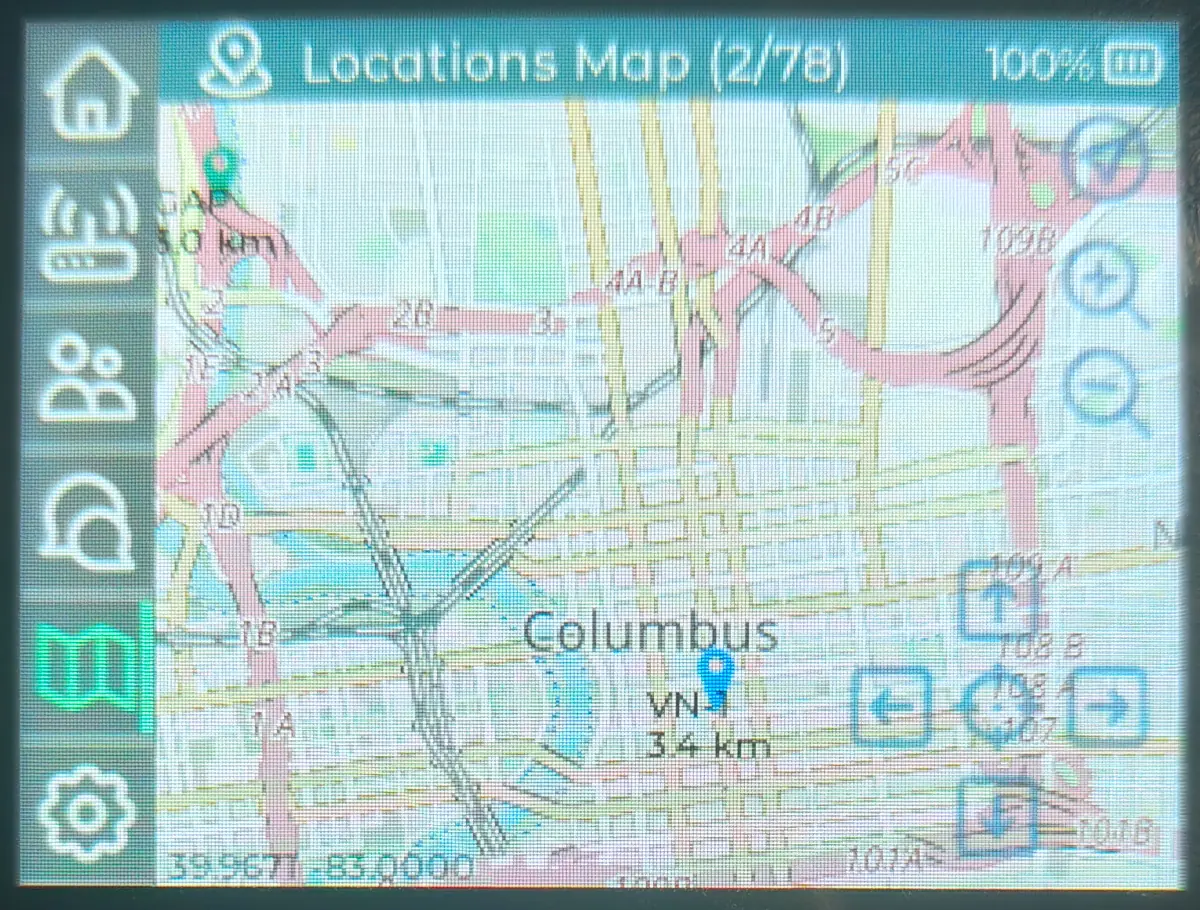
- Map of current location and nodes
- Settings page
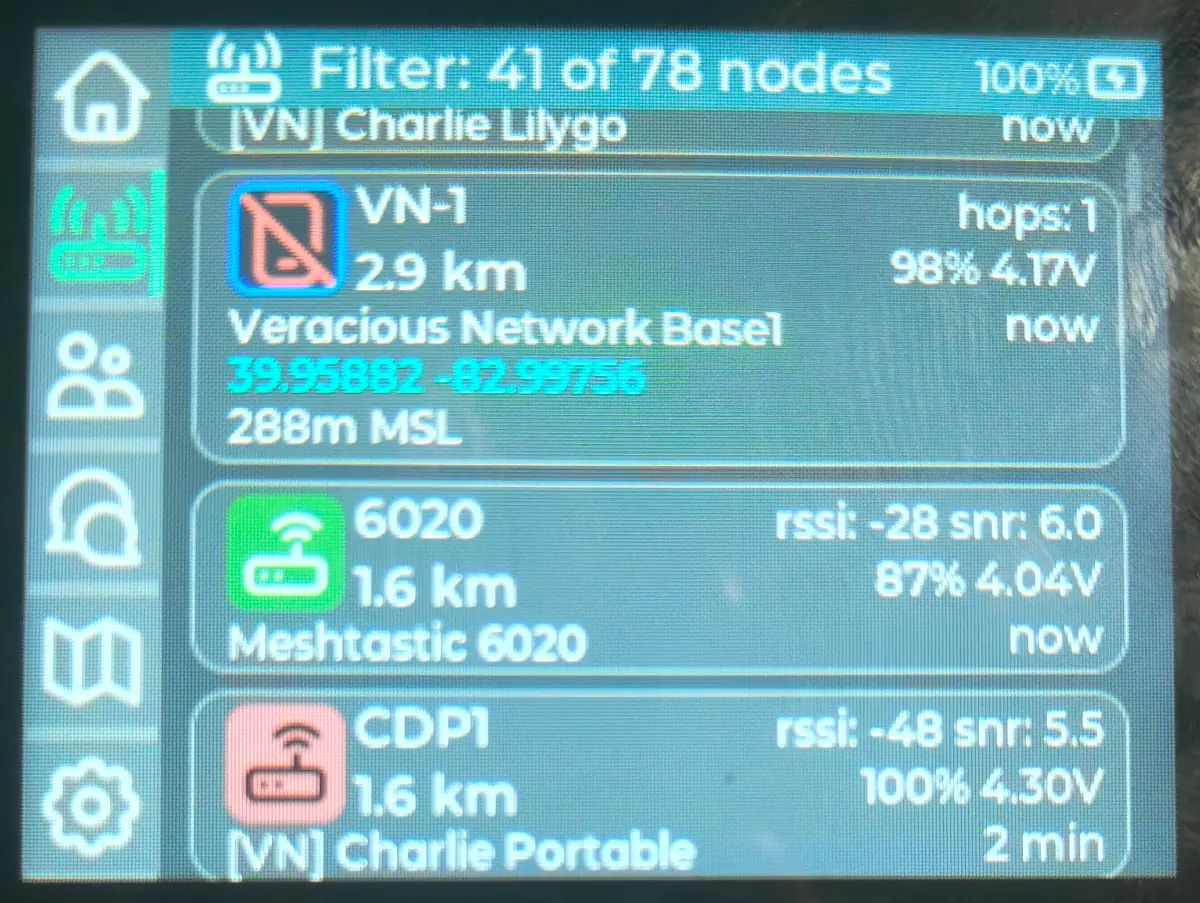
Long-pressing on the respective icon opens a settings pane, (for available apps), to control some settings such as node filters and map selection.
The interface is rudimentary but it gets the job done; you can read messages via the color display and send with the builtin keypad. The notable thing is the device's ease of use. While not Apple-level simple, it's still simple for users to operate.
Audio
The T-Deck Plus includes a speaker and 2x microphones and is theoretically capable of transmitting and receiving audio on MediumFast (3.52kbps) and faster modes when using the Codec2 compression codec. Unfortunately this functionality is quite rare on other Meshtastic devices and is not officially supported by Meshtastic so I was not able to test if realtime audio works across the LoRa radio.
Recently Adrelien was experimenting with sending audio, though their experiment failed since they used 8kHz 16-bit PCM MPEG-3 encoded data which lacks the compression ratio required for low bandwidth devices. (8kHz 16-bit PCM is 128kbps vs Codec2 is capable of bandwidth as low as 700bps.)
(On a totally unrelated note, developers who are learning the industry should NEVER, EVER, rely solely on programmatically generated code provided by "AI" LLM applications as they lack the full context of your business requirements and do silly things like suggesting to push fat MP3 audio through a teeny tiny pipe.)
Display and controls
The 2.8" 320x240 feels perfectly sized for the device and the touchscreen allows for navigation around the UI. The keypad buttons feel solid given the low cost of the radio, though the buttons are a bit on the small side, not surprising for handheld devices. Each key has adequate spacing between the keys to assist with accurate typing and the radio feels comfortable in your hands.
The trackball is a nice reminder of IBM laptops but as of the Meshtastic UI 2.7.5 doesn't provide much benefit in the UX. Pushing the trackball down is "select" and drops the device into programming mode when used along with the reset button, but other than that it doesn't serve much function.
Scrolling the trackball moves the cursor as if it was a mouse, but it feels like it should instead act like a scroll wheel to roll up through messages or pan around the map.
Antenna
The Plus ships with an internal antenna which is sufficient for normal usage and is convenient that you don't have an antenna sticking out from the device as it sits in your pocket. If you do prefer an external antenna however, the case features cut outs at the top which allow you to easily install an external antenna of your choosing.
This is a welcome feature, giving options on how you configure your own device.
Drawbacks
Bluetooth
The radio has bluetooth but it's only available for programming mode. This means that unlike other Meshtastic radios which support viewing node data and messages via a phone application, only configuration settings can be changed when bluetooth is enabled.
While the radio has the necessary capabilities to not require a phone, some functionality such as remotely managing another radio via the LoRa network must be done from a desktop or mobile application proxied via bluetooth or serial.
Since bluetooth forces the radio into programming mode, this advanced functionality just is not possible.
Serial over USB
Like other Meshtastic radios, the USB offers a serial interface to a computer for configuring and using. This connection allows you to use desktop applications to access the LoRa network or change settings but it's not overly reliable.
The serial device will be available for a short period when the device is plugged in, but will disconnect after a few minutes.
This means that it's usable, but you need to be quick with your work as you will need to frequently unplug and replug the USB connection.
Configuration
Though the device can be configured via USB, it's not reliable. If you change multiple settings at once, it's possible that not all will be saved.
This may require you to change one or two options at a time, save, wait for the device to restart, then unplug and replug the radio to change the next option.
Lack of settings and functionality
Moreso a limitation of the Meshtastic UI, but needs to be stated. The GUI application on the radio offers limited options, ie: the GPS antenna cannot be configured from the radio itself.
Other useful features are lacking from the UI, such as marking a node as a favorite and generating a QR code to share channel information.
Sluggish UI
Not surprising for people who remember gaming on a 300MHz Pentium i586, but 240MHz does not offer a lot of power to manage UI elements and respond to user interaction. This will probably be improved as the software becomes more stable, but as of Meshtastic 2.7.5 the map application takes some getting used to.
For example, there is no "pinch and zoom" and tile refreshing takes a second or two to render the new view.
I personally am still impressed that it even has such a functional map and don't find the responsiveness bad enough to be unusable, but it's something that needs to be taken into account for users who are accustomed to a battery hungry 2GHz smart phone.
Battery life
Running a 240MHz processor on just a 2Ah battery won't be breaking any longevity records, but it's enough to get through the day on a hiking trip. If you plan on using this radio on a multi-day trip however, ensure that you have backup batteries or a solar battery banks which you can use to recharge the radio once you get back to base. Since it can charge via its USB-C port, a good battery bank will be a solid companion with this radio.
I personally use the Anker 10Ah USB battery bank, enough capacity to give a full charge to your phone or gadget, but still small enough to fit in a pocket.
GPS Slot
The chassis of the T-Deck Plus is the same case as the base model. This includes a slot on the side for the external GPS module, (or other GPIO module).
The circuitry on this slot is already used by the internal GPS radio so the slot on the Plus is unnecessary. This doesn't affect any functionality and is more of just an observation, and a 3D printed plug could be made to close it up, but it would have been nice if a small rubber cover was provided.
Upgrade firmware
Access the Meshtastic flashing utility with a Chromium-based browser and plug in the Lilygo T-Deck via USB.
If this is your first device flashing and it is not accessible, ensure that your user account is a member of the dialout group.
sudo usermod -a -G dialout YOURUSERNAME
Restart your computer and you should be able to access the device via its serial interface to install the firmware.
If you're running Windows, you probably need a driver or something. (I dunno, I haven't ran that OS in decades.)
You probably need to place the device into firmware mode by holding down the trackball button while pressing the reset button on the side. The screen will not turn on while in this mode, but it should be accessible via the flashing utility.
Installing the map
The map application is fully functional, but requires some set up to install the map assets. This is because the device does not have an internet connection so all tile images must be stored locally on the μSD card.
To install map tiles, Map Tile Downloader can be used to download tiles from a variety of sources.
git clone https://github.com/mattdrum/map-tile-downloader
cd map-tile-downloader
python3 -m venv venv
source venv/bin/activate
pip install -r requirements.txt
python src/TileDL.py
This will install map tile downloader and start a local web server to configure and download map tiles. Map tiles can be very large so you can pick specific regions to download.
Zoom level 0 is the entire earth in a single 256x256 tile. Zoom level 10 shows the major roads in a city. Zoom level 15 shows minor streets and walking trails. With this utility you can select which regions to have a detailed map.
My recommendation is download 0-7 worldwide to have a base map of everywhere. This will show major cities everywhere at least.
Then for states which you would like to have some visibility to, download 8-10 to show most towns and highways.
Lastly for the specific region where you will commonly be using the radio, download 11-16 for a very detailed roadmap.
Cache and future uses
Keep the application installed after you use it, as you can re-launch the tile downloader to select additional regions and the application will preserve a cache of previously downloaded map tiles. This allows you to add additional tiles to your collection without re-downloading previously downloaded tiles.
Downloading tiles on repeated runs will provide the entire tiles in cache, not just selected tiles during the run. This allows you to completely replace your map database each time, (or merge files without overwriting if your operating system supports it).
Installation on radio
To install the map tiles on your radio, copy your downloaded tiles to your μSD card in the maps directory. If you use Open Street Map place the tiles in osm.
SD Card
+- maps/
    +- osm/
      +- 0/
        +- 0/
          +- 0.png
      +- 1/
        +- 0/
          +- 0.png
          +- 1.png
        +- 1/
          +- 0.png
          +- 1.png
This allows you to have multiple tile designs installed, and toggle between them by changing the map in the map settings on the device, (long-press the map application icon).
Enabling GPS
A map to display other nodes' position is useful, but would be more useful if you could see your position as well.
The T-Deck Plus features a GNSS GPS/GLONASS radio for retrieving the device's location but must be enabled to make use of it.
This is done via the Position panel of the radio's configuration on either the mobile application or desktop application.
Due to the radio's buggy serial interface, you may need to adjust settings one option at a time.
- GPS Mode:
Enabled - Receive Pin:
44 - Transmit Pin:
43 - Enable Pin:
0
Other options in the GPS may be useful, but are more case-specific based on your requirements for the radio. On my personal carry node smart position is enabled with a broadcast of 900 and update/interval set to 120 to only check position every 2 minutes.
Check our Meshtastic configuration guide for additional settings.