Meshtastic Configuration Settings
This guide provides a breakdown of common settings I have found to be useful for general use cases on the Meshtastic network with standard devices. For a full breakdown of all options supported in Meshtastic nodes, refer to the official documentation for Meshtastic.
User
Provides device name and identifier information.
If you do not plan on monitoring the device for messages, ie: it will be an isolated node to relay messages only, it is recommended to toggle Unmessageable
just to denote to other clients that direct communication with this device will not be seen by anyone.
Licensed HAM operators can toggle that option if you want to transmit at higher power rates, at the drawback of not being allowed to encrypt traffic. (Even if you are a licensed operator, it's generally recommended to leave this disabled to provide more functionality.)
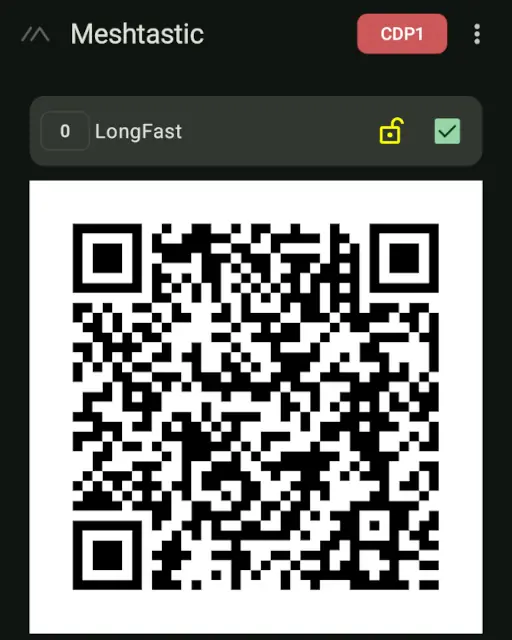
Channels
Primary channel is used to transmit your device's location, battery status, temperature/humidity/pressure data, and other general data. It is recommended to use the default shared channel, but you are free to use your own settings if you wish to set up a private network for your personal devices to communicate.
Default frequency is 906.875MHz on slot 20. Changing the name of the primary channel will change this base frequency!
Precision allows you to specify how accurate of a location fix to broadcast. Since some Meshtastic device have GPS included they have the ability to obtain your precise location down to a few meters. For security reasons it is usually advisable to obscure your personal location if you choose to broadcast it, but how much is up to you.
2392 feet or 729 meters radius gives obscurity of a few city blocks, enough to know which neighborhood the device is located within, but not necessarily which street.
For rural users however where there may be a kilometer between houses, you may prefer to go with a more obscure option.
Primary
- Channel Name:
LongFast - PSK:
AQ== - Uplink/Downlink: Controls MQTT retransmission, if available
- Position Enabled: ✔ï¸
Enabled - Precise Location: âŒ
Disabled - Precision:
2392 ft
Secondary
Additional channels can be set up with precise location tracking for your personal devices. This also creates a group chat with all your devices, encrypted with AES.
Device
Allows you to control how the device behaves, most of which affect only the device itself, but Role affects how the device interacts with the network.
For your specific timezone, refer to the Posix timezone list.
- Role:
CLIENT - POSIX Timezone:
EST5EDT,M3.2.0,M11.1.0
Position
Smart position can be useful for mobile nodes, as they can keep track of their position and only broadcast when they have moved so far. Alternatively fixed position can be used for static nodes which do not contain GPS modules, (or disabled to save power).
Traditional GPS takes a lot of power, so use your best judgement when applying settings. A device with a fast update interval will better track its position but will drain the battery faster. For battery-powered devices which are not expected to move quickly, (ie walking or hiking), an update interval of 120 or 300, (2 minutes or 5 minutes), is probably sufficient while still preserving battery life.
For vehicle-based nodes running off the car's electrical system, an update interval of 10 seconds is probably fine as the device draws power from the car.
For devices that use GNSS, timestamp data appears to be unavailable and devices which lack geopositioning capability altogether should disable this functionality completely.
- Position broadcast:
900 - Smart position: ✔ï¸
Enabled - Smart broadcast:
100m/60 - GPS update interval:
60 - Position flags:
939(Add Timestamp)
Power
Adjust if you want to control sleep settings. I usually leave these disabled for general purpose devices.
Network
Join your device to a wifi network, warning, will disable bluetooth. I usually just enable Bluetooth for general devices, as they travel around. For stationary nodes, it may make sense to use a network connection instead though.
Display
Controls the display functionality, (only for devices which have a display of some sort).
Some notable options for your personal preference are Display units and Use 12h clock.
LoRa
These settings control how the radio talks with other nodes on the network, so is critically important for communication. If you use a custom network, you can adjust these, but all your devices must share the same settings.
If you do not want your device visible on those cool online maps of the network but still participate in the default network, ensure that OK to MQTT is disabled. This will broadcast a flag to other nodes to not forward your device to the internet.
- Use modem preset: ✔ï¸
Enabled - Modem Preset:
LONG_FAST - Frequency offset:
0.0 - Region:
United States - Hop limit:
3 - TX enabled: ✔ï¸
Enabled - TX power:
30 - Frequency slot:
20 - Override frequency:
906.875 - OK to MQTT: ✔ï¸
Enabled
Bluetooth
Just sets your bluetooth options. For devices without a screen detected, a fixed pin of 123456 is used.
It's really recommended to pick something else or leave it on random if your device has a screen.
Bluetooth is only available when wifi is disabled.
Security
Provides some security options for your device and displays your public and private keys. This public key is required when managing another node from across the LoRa network.
Admin Key
This section allows you to set a public key of another device that is authorized to manage it across the LoRa network. This can be extremely useful if you need to manage a node out of Bluetooth and wifi range.
To set up a remote admin key:
- From the command and control device, (your personal node), go to Security and copy the public key.
- Switch to the soon-to-be remote device and go to its Security
- Tap add to add a new field
- Paste your personal node's public key
- Tap Send to save the new key
Some notes when using the remote key functionality:
To manage the remote node browse to its details
and scroll down to Remote Administration. From there you will be able to issue commands as if you were connected via Bluetooth.
Managed Mode is NOT required for remote management and will DISABLE Bluetooth and wifi management! DO NOT ENABLE unless you know what you are doing!
MQTT
Adds the ability for your device to send IP packets on the network (or through a paired phone) to an MQTT network. This will enable communicate world-wide and will cause a lot of traffic and notifications!
Fun to play with and stations with a nearby internet connection can benefit from it, but I generally leave it disabled for general purpose nodes.
Quick Ref - Seconds to Minutes/Hours
| Seconds | Min/Hrs |
|---|---|
| 60 | 1 min |
| 120 | 2 min |
| 180 | 3 min |
| 240 | 4 min |
| 300 | 5 min |
| 600 | 10 min |
| 900 | 15 min |
| 1800 | 30 min |
| 3600 | 1 hr |
| 7200 | 2 hrs |
Other Useful Links
- Meshtastic Site Planner
- Meshtastic Firmware Flasher (Chromium-based browser only)
- Meshtastic Web Client (Chromium-based browser only)
- Meshtastic Node Map by Liam Cottle
- Meshtastic Mesh Map by Brian Shea
- Meshsense Map by Affirmatech
- Local Meshsense by Affirmatech
Final Notes
This is not an exhaustive list of options available but hopefully will help you get up and running quickly with a Meshtastic device! If I've forgotten something useful or you feel something should be adjusted, please let me know in the comments!